Five Essential Macramé Knots for Beginners
Macramé is made by arranging cords and tying them into repeated knots. You do not need a hook or a special machine: a smooth place to anchor the cords, a ruler, and a little practice are enough to get started. This guide explains five useful macramé knots and techniques, how to keep them even, and how to practise them in a small sampler before starting a larger wall hanging or plant hanger.
For another visual reference, Kansas State University’s 4-H macramé guide includes step-by-step knot photos for lark’s head, square, and double half-hitch knots. Use it to compare the cord crossings with the written steps here.
The instructions use four-cord groups where appropriate. In each group, the two outer cords are the working cords; they move to form the knot. The two middle cords are the filler cords; they stay in the centre and give the knot its shape. Once you can identify those roles, the steps become much easier to follow.
Materials for a macramé practice sampler
Start with a short practice piece rather than cutting cord for a finished project. A smooth dowel, ring, or a firmly secured cord can serve as an anchor. Choose a cord that is easy to see and handle; medium cotton cord is comfortable for learning, while very fine cord can make the loops harder to follow. Cord length depends on the project, the knot pattern, and how tightly you work, so follow the project measurements when making a finished item.
- A short wooden dowel or a stable ring
- Macramé cord and sharp scissors
- A measuring tape or ruler
- A hook or other secure way to hold the anchor still
- A clipboard or tape to keep the work from shifting, if useful

1. Lark’s head knot: attach cord to a dowel
The lark’s head knot is a mounting knot, not usually a decorative knot. It attaches a folded cord to a dowel or ring and creates two hanging strands for later knots.
- Fold one cord in half so the two cut ends meet and a loop forms at the centre.
- Place the loop over the front of the dowel and pass it behind the dowel, or bring it up from behind, depending on the finish you want.
- Feed both loose ends through the loop.
- Pull the ends down evenly until the knot sits snugly against the dowel. It should hold securely without crushing or twisting the cord.
For a row of mounted cords, make each lark’s head face the same way and slide the knots together before you begin. Consistent spacing makes the first row easier to read.
2. Square knot: make a flat, balanced knot
A square knot uses four strands. Keep the two centre strands straight as fillers and use the outside strands to make two opposite half knots. The second half must cross in the opposite direction from the first; otherwise the work will begin to spiral.
- Bring the left working cord across the front of the two filler cords, leaving a loop on the left.
- Take the right working cord over the loose end of the left cord, behind the filler cords, and out through the left loop.
- Hold the filler cords steady and pull both working cords outward evenly. This completes the first half knot.
- Now mirror the movement: bring the right working cord across the front, make a loop on the right, pass the left cord over its loose end, behind the fillers, and through the right loop.
- Pull the two working cords outward with even pressure. The two halves together make one square knot.
Check: the knot should look like a compact, flat band, with the two filler cords running down its centre. If it twists, undo the last half and check that you switched sides.

3. Alternating square knots: create an open diamond mesh
Alternating square knots are a layout made by placing square knots on staggered rows. They are useful for open panels in plant hangers and wall hangings. They are not a different knot: the change is in which cords you group together.
- Tie square knots across the first row, using four strands for each knot.
- For the next row, leave the first two strands unused. Use the next four strands to tie a square knot beneath the gap between the first-row knots.
- Continue across the row, leaving the final two strands unused if needed.
- For the following row, return to the first alignment and repeat.
Keep the row spacing consistent. If the new knots sit too close to the first row, the mesh closes up; if they sit too far away, the diamonds become long and loose.
4. Half-square knot: form a spiral sinnet
A half-square knot is the first half of a square knot. Repeating the same half from the same side makes the work rotate into a spiral cord, often called a spiral sinnet. Use two working cords around two filler cords.
- Make the first half of a square knot using the left working cord over the fillers and the right working cord through the loop.
- Snug the knot while keeping the filler cords straight.
- Repeat that same left-first half knot. Do not mirror it.
- Continue, checking that the spiral turns consistently. Turn the work in your hands if that makes it easier to keep the cords untwisted.
To make a flat square-knot band instead, alternate the starting side after every half knot so each pair forms a complete square knot.
5. Double half hitch: make a firm line or diagonal
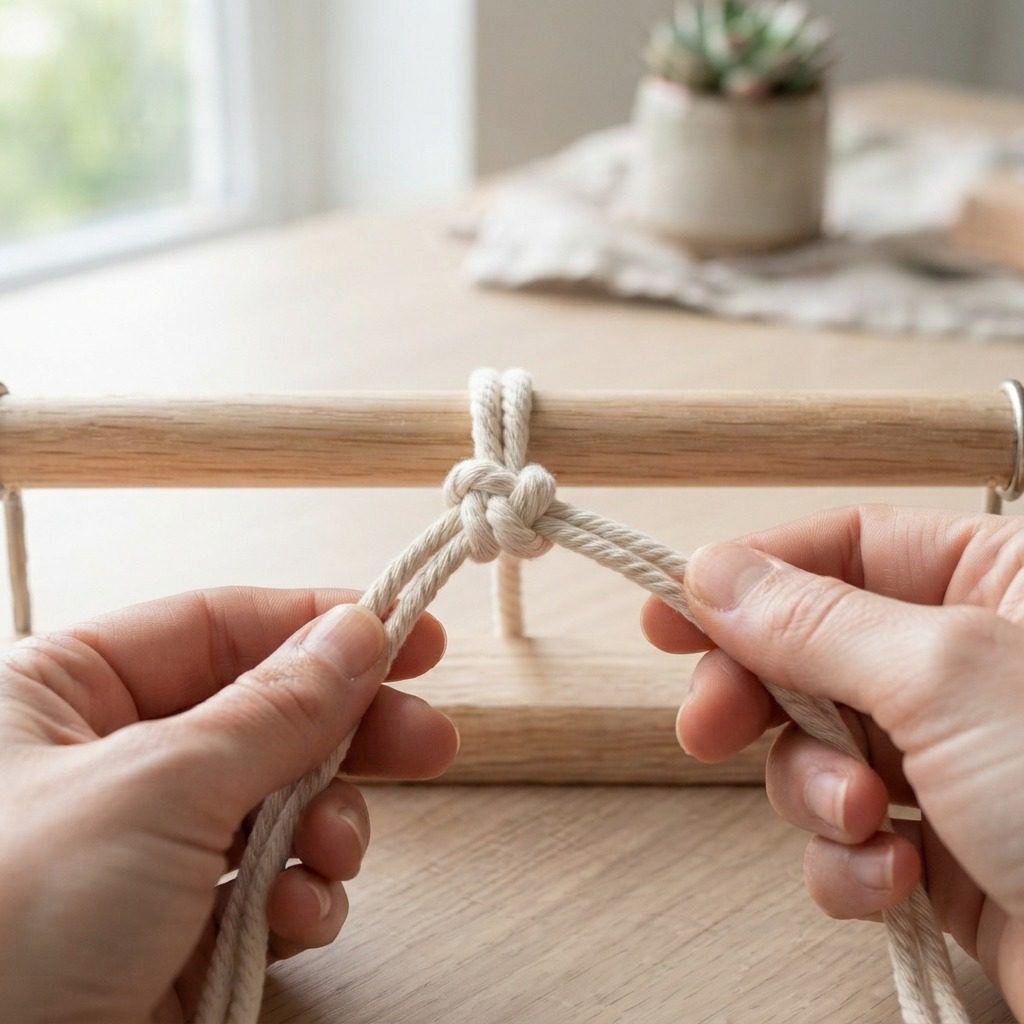
A double half hitch is made by wrapping one cord twice around a separate guide cord. The guide cord sets the direction of the line. Hold it taut, but do not pull so hard that the work bends or the knots distort.
- Choose a guide cord and hold it horizontally for a straight row or diagonally for a slanted line.
- Take the next cord and pass it over the guide, around behind it, and through the loop made by the cord.
- Pull the cord up toward the guide to snug the first hitch in place.
- Repeat the wrap with that same cord to make the second hitch.
- Use the next cord in the row and repeat. Keep the guide in the same position while working.

A short practice routine
Mount several folded cords on a dowel. Make one short row of square knots, a second row of alternating square knots, and a short spiral with a four-cord group. Finish with a diagonal double-half-hitch line. This small sampler lets you compare the knots without committing to a large project. Keep the first few knots loose enough to undo, then tighten them gradually as your hand learns the movements.
Troubleshooting uneven macramé knots
- The square-knot band spirals: you repeated the same half knot instead of switching sides. Undo to the last balanced knot and mirror the next half.
- The knot widths vary: use the same outward pull on both working cords and snug knots to the same height.
- A hitch row curves: the guide cord may be slack, or the knots may be too tight. Re-tension the guide and relax the wraps.
- The mounted cords slide: secure the dowel and tighten each lark’s head evenly. Some cord materials are naturally more slippery, so test the mount before making a hanging piece.
- The fringe looks ragged: comb only combable cord types gently and trim on a flat surface with sharp scissors. Some braided cords do not brush into fringe.
Frequently asked questions
Which macramé knot should I learn first?
Start with the lark’s head to mount your cords, then practise square knots. The square knot teaches you how working and filler cords behave and is the basis for several common layouts.
Why does my macramé spiral?
A spiral is expected when you repeat half-square knots from the same side. If you want a flat square-knot band, alternate the starting side after each half knot.
How much cord should I cut?
There is no single reliable multiplier for every design. Finished length changes with cord thickness, knot choice, spacing, and personal tension. Follow the measurements for the specific pattern and, when adapting it, make a small sample first so you can estimate the cord use before cutting all strands.
Try the knots in a small project
Once the movements feel familiar, use them in a simple project. Practise a compact design with our easy macramé bracelet tutorial, or try the cord shaping in the macramé fox keychain guide. For another example of diagonal hitch rows, see the macramé owl keychain tutorial. Follow each project’s own cord measurements; the practice sampler is for learning the knot motions.