Discover the Timeless Charm of Lavender Embroidery
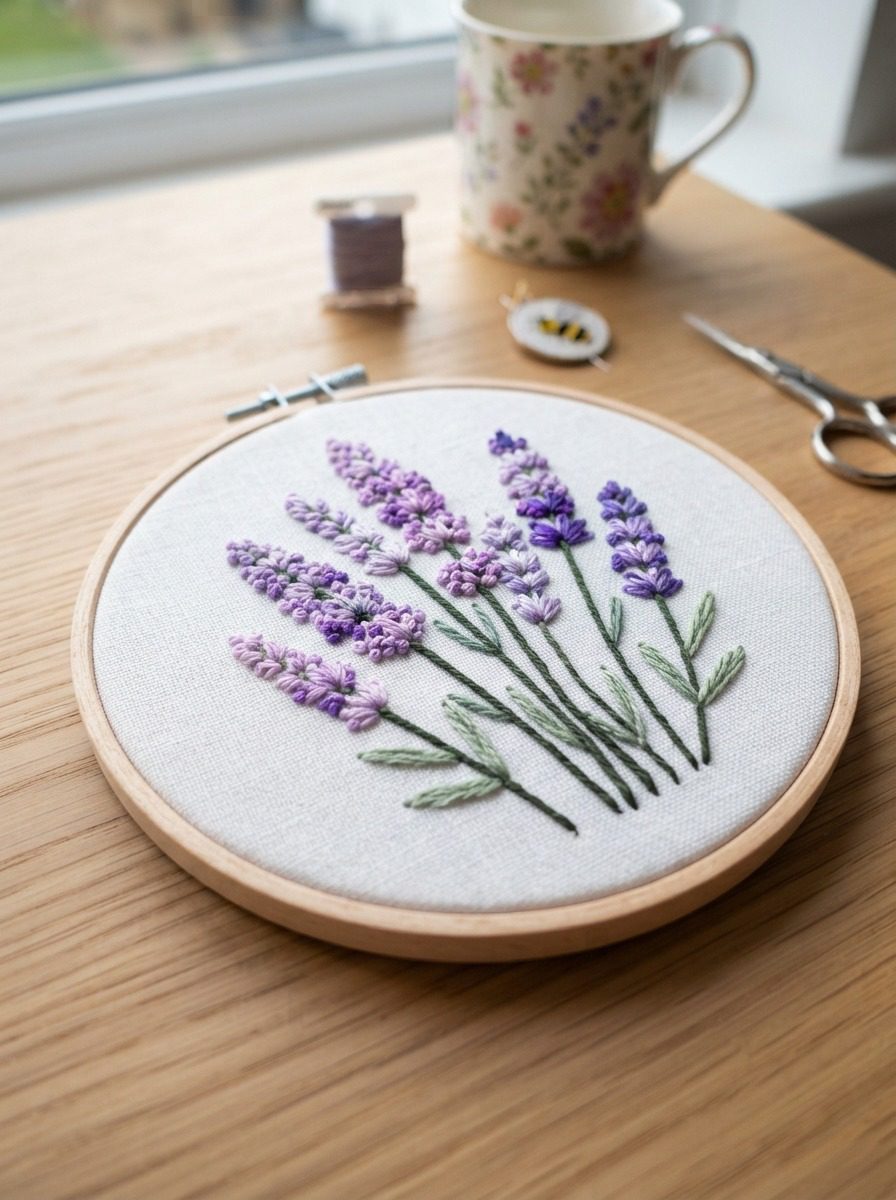
Few botanical motifs bring as much calming elegance to needlework as lavender embroidery. With its slender stems, delicate clusters of fragrant florets, and soft foliage, stitched lavender brings a delightful touch of springtime to linen napkins, garment collars, canvas totes, or framed wall art.
In this masterclass tutorial inspired by needlecraft expert Simply Embroider, you will discover how to create dimensional, realistic lavender flowers using an ingenious combination of foundation straight stitches, the textured Portuguese border stitch, a smooth fishbone leaf, and a graceful stem stitch. Whether you are picking up an embroidery hoop for the first time or expanding your needlework repertoire, this floral pattern creates stunning results with minimal fuss for your lavender embroidery project.
Unlike traditional French knots which can sometimes appear uneven or prove tricky for novices, using wrapped border techniques creates perfectly uniform floret clusters with rich tactile dimension. Let us gather our materials and begin stitching this charming herbal spray for your lavender embroidery project.
Essential Materials and Tools Checklist
Before making your first stitch, assemble your supplies. Choosing high-quality natural fibers ensures smooth thread passage and prevents fabric puckering for your lavender embroidery project.
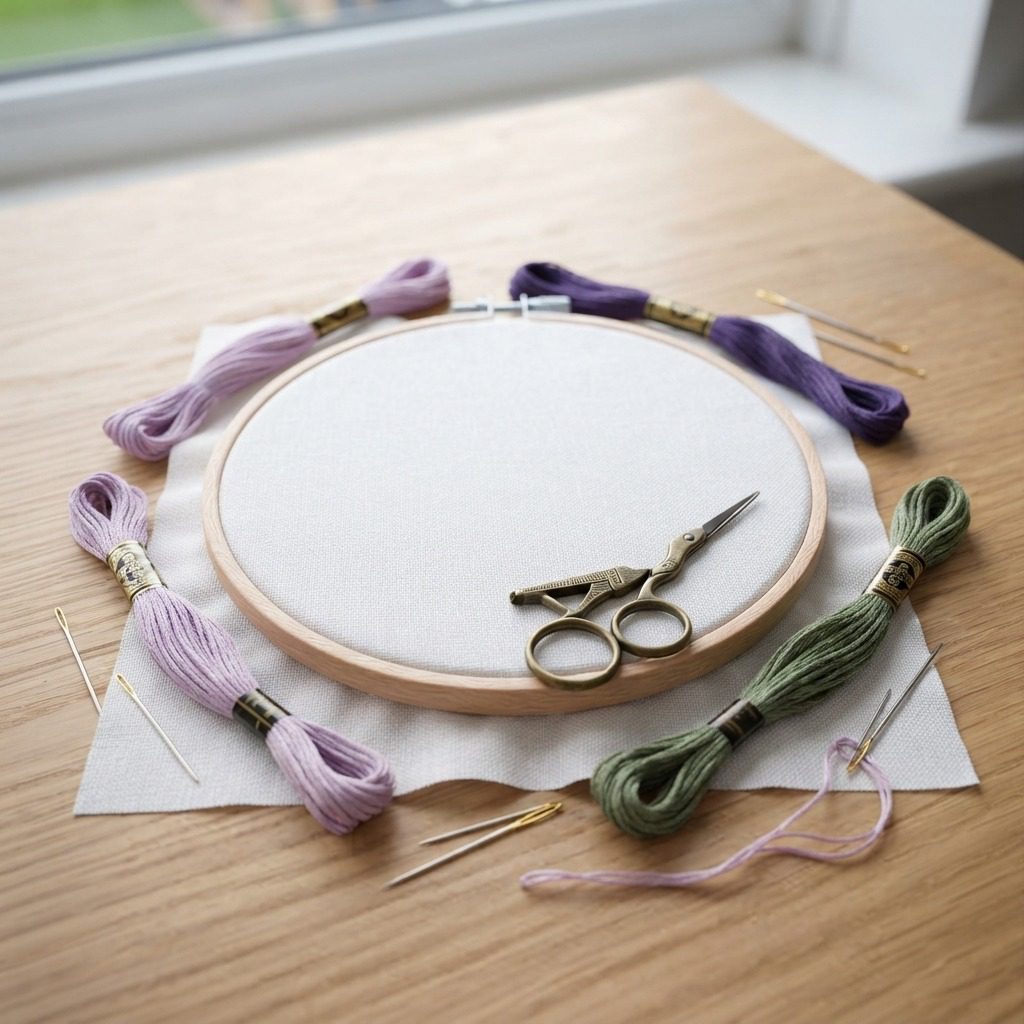
- Fabric: Medium-weight tightly woven white cotton or natural linen fabric (approx. 8 x 8 inches).
- Embroidery Hoop: 5-inch or 6-inch round wooden beechwood embroidery hoop with adjustable brass tension screw.
- Embroidery Floss (Six-Strand Stranded Cotton):
- Light Lilac / Soft Purple (DMC 210 or similar) for upper florets.
- Deep Royal Violet / Dark Purple (DMC 550 or similar) for base floret accents.
- Moss Green / Olive Green (DMC 3346 or similar) for leaves and stem.
- Needles: Size 7 and Size 9 embroidery (crewel) needles with sharp points and smooth eyes.
- Scissors: Sharp vintage brass embroidery snips for precise thread cutting.
- Marking Tool: Heat-erasable fabric pen or fine water-soluble pencil.
Crafter Note: A sturdy wooden hoop that maintains drum-tight fabric tension is essential for dimensional surface stitches. Ensure your fabric does not slip while pulling thick thread bundles for your lavender embroidery project.
Stitch Glossary & Transferring Your Pattern
This botanical design combines four fundamental embroidery stitches. Familiarizing yourself with these techniques allows you to execute this lavender embroidery with complete confidence:
- Straight Stitch: Simple flat stitches that create the foundation rungs (ladder) supporting the wrapped petals.
- Portuguese Border Stitch (Lavender Stitch): A surface wrapping technique worked over straight stitch bars to create raised, knotted grain-like florets.
- Fishbone Stitch: An overlapping diagonal fill stitch that produces a realistic leaf with a central vein line.
- Stem Stitch: A classic outline stitch creating smooth, rope-like organic flower stems.
For more inspiration on combining beginner-friendly stitches into creative textile projects, explore our detailed character embroidery tutorial to see how foundational lines build expressive artwork for your lavender embroidery project.
Transferring the Lavender Design
Using your fabric pen, lightly sketch two gently curving central stem lines meeting near the base. Along each flower stem line, mark 7 to 9 horizontal crossbars spaced approximately 2 to 3 millimeters apart, tapering slightly shorter toward the top. Sketch a single elongated almond-shaped leaf along the lower right stem for your lavender embroidery project.
Step 1: Stitching the Foundation Straight Bars
Mount your fabric tightly in the hoop. Thread your crewel needle with 4 strands of light lilac floss and knot the end for your lavender embroidery project.
- Bring your needle up at the left end of the lowest horizontal guideline on your first stem.
- Insert the needle directly across at the right end of the guideline, pulling the floss flat to form a neat horizontal straight bar.
- Repeat this process for every marked rung ascending the stem, keeping stitch tension firm and parallel.
- Complete the foundation bars for both lavender stems in the same manner.
Step 2: Creating Textured Florets with Portuguese Border Stitch
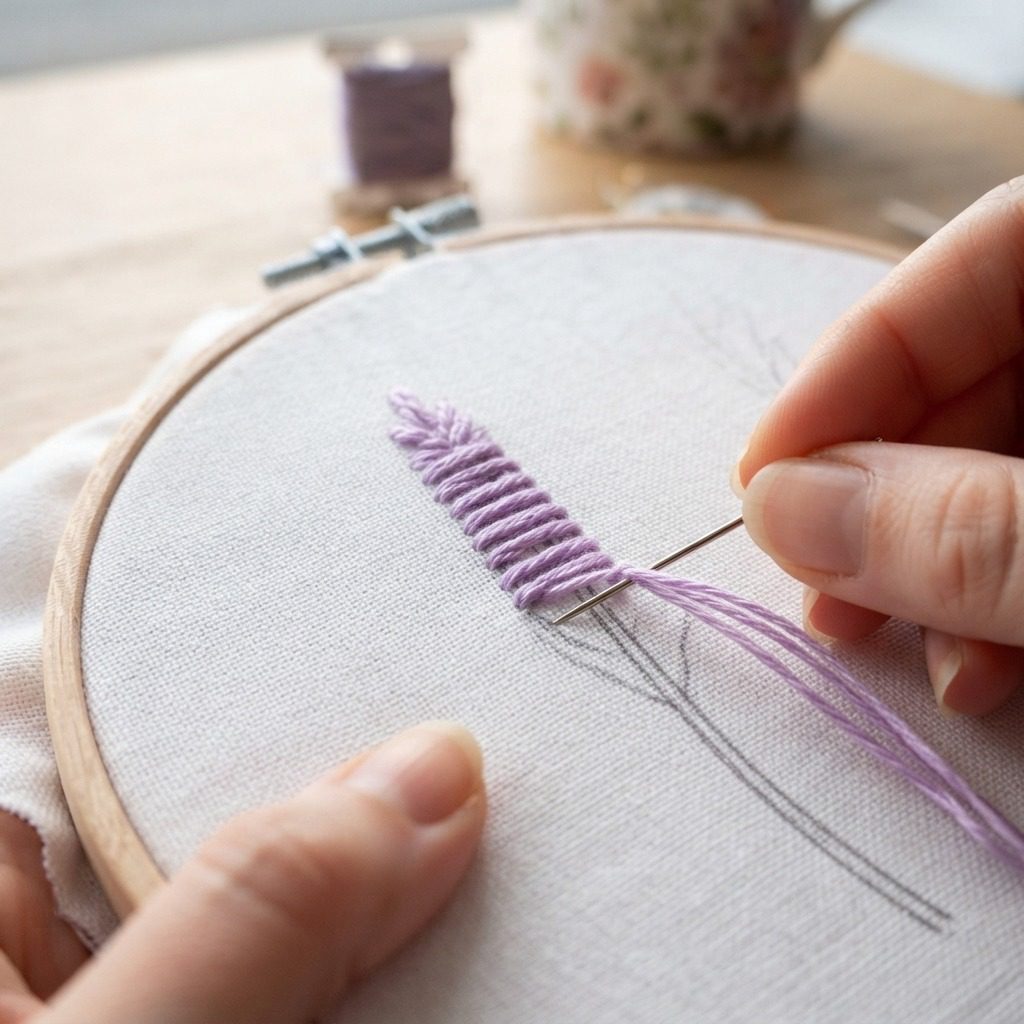
The distinctive fullness of lavender embroidery comes alive through the wrapped Portuguese border technique. This stitch builds thick, dimensional knots over your foundation rungs without distorting the backing fabric.
Thread your needle with a generous bundle of 12 strands of light lilac embroidery floss (you can double a 6-strand length through the needle eye) to produce rich, plump floret knots for your lavender embroidery project.
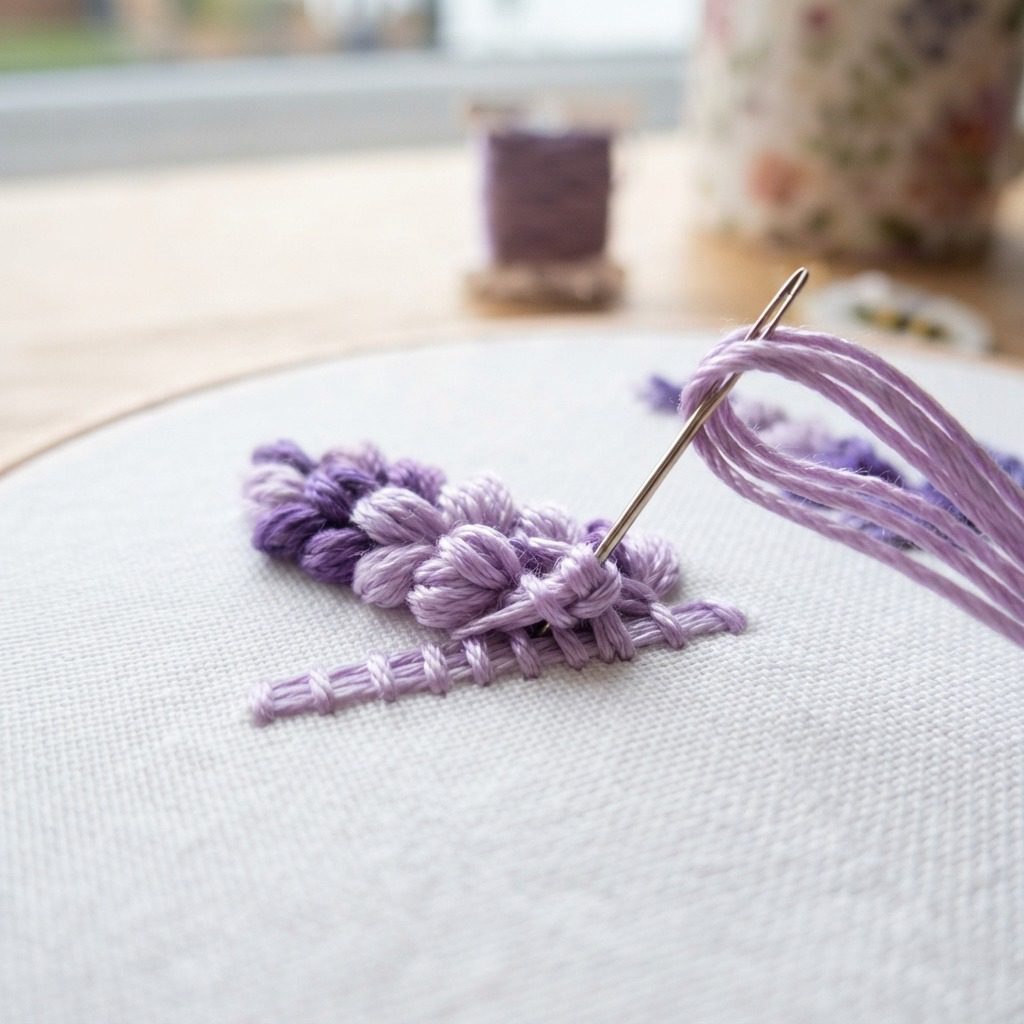
Stitching the Left Lavender Spike
- Starting the Column: Bring the needle up through the fabric directly below the bottom-most straight stitch bar, centered slightly to the left.
- First Wrap: Slide the needle underneath the lowest straight stitch bar from right to left without piercing the background fabric. Pull the thread upward until it rests snugly against the bar.
- Second Interlocking Wrap: Pass the needle beneath the bar a second time, guiding the thread loop so it wraps securely over the first pass to create a rounded knot.
- Ascending to Next Bar: Move up to the next horizontal bar. Slide the needle under the rung, loop around, and wrap twice as before, stacking the floret cluster neatly on top of the previous knot.
- Reaching the Top Tip: Continue ascending rung by rung until you reach the uppermost bar. At the peak, take the needle down through the fabric right above the final rung to secure the left half of the flower.
Stitching the Right Column
Bring your needle up at the bottom of the right side of the rungs. Mirror the identical double-wrapping technique upward along the right edge of each horizontal bar. As both columns meet in the center, they form an interlocking, textured spike resembling natural lavender buds in full bloom for your lavender embroidery project.
Step 3: Base Shading and Botanical Greenery
Adding depth through subtle color variation gives botanical embroidery an authentic, professional finish. Follow standard textile guidelines from the hand embroidery stitch reference to ensure your tension remains balanced across color transitions for your lavender embroidery project.
Adding Dark Violet Base Accents
Thread your needle with 4 strands of deep royal violet floss. At the base of each lavender spike where florets connect to the stem, stitch 3 to 4 small vertical straight stitches over the bottom wraps. This creates a realistic shadowed calyx effect, anchoring the pastel blossoms for your lavender embroidery project.
Step 4: Stitching the Fishbone Leaf
Thread your needle with 2 strands of moss green embroidery floss to keep the leaf delicate and finely detailed for your lavender embroidery project.
- Bring your needle up at the pointed tip of the leaf outline. Make a single straight stitch down along the center vein line about 3 mm long.
- Bring the needle up on the left outer contour of the leaf, just below the tip. Cross over the center line and plunge the needle down on the right side of the central stitch.
- Bring the needle up on the right outer contour, cross over the center, and plunge down on the left side of the vein.
- Continue alternating left and right diagonal stitches down the entire length of the leaf shape until the leaf surface is completely filled with a dense, woven herringbone texture.
Stitching the Slender Stems
Using 2 strands of moss green floss, begin at the base of the lavender heads and work a smooth stem stitch along the drawn lines down to the base: for your lavender embroidery project.
- Take a small stitch forward along the line, keeping your working thread consistently on the right side of the needle.
- Bring the needle up halfway back along the previous stitch line, then take another stitch forward.
- Repeat until all stems are gracefully joined at the base.
Finishing, Care, and Troubleshooting Guide
Proper finishing protects your hand embroidery and preserves crisp stitch definition for years to come for your lavender embroidery project.
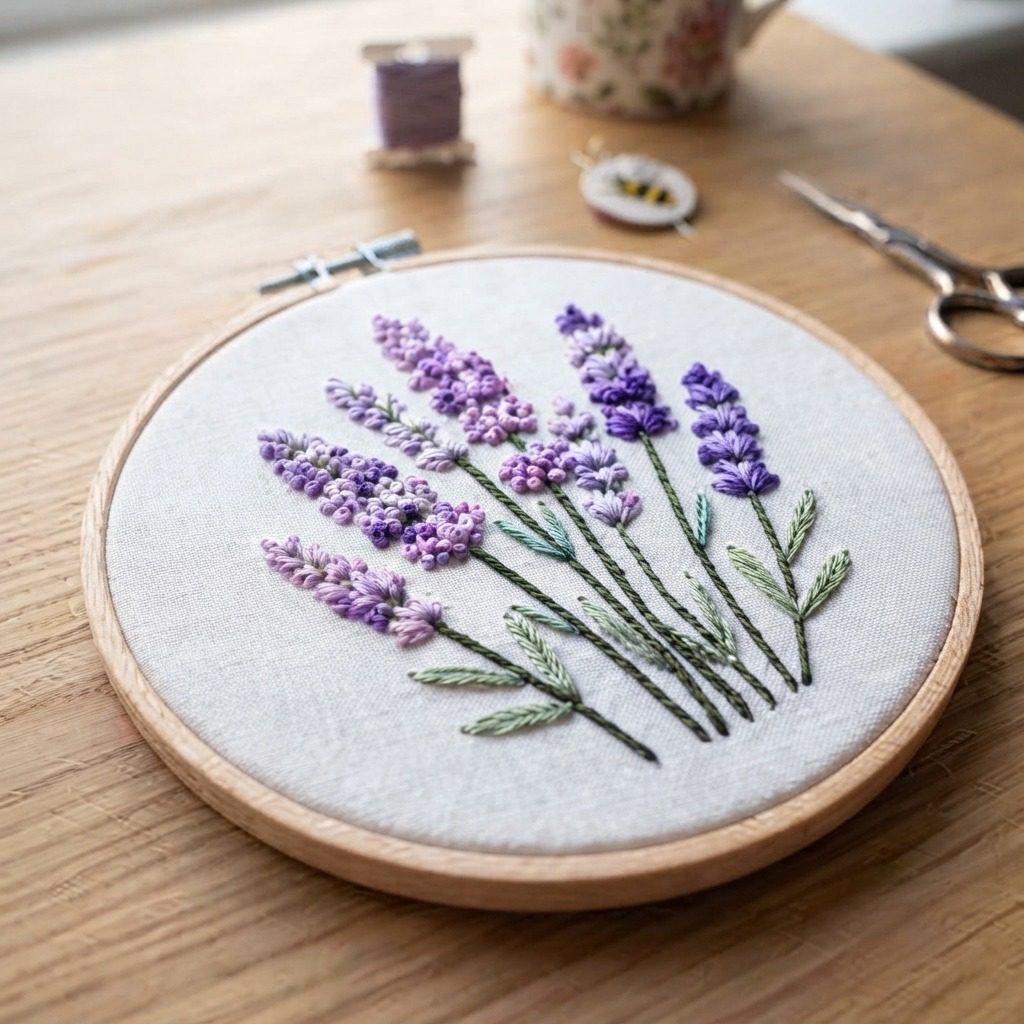
Securing and Displaying Your Work
Once stitching is complete, remove any visible pen marks according to the manufacturer instructions (a light mist of water or gentle warmth from a hair dryer). Trim excess fabric around the back of your hoop to approximately 1.5 inches, then work a gathering running stitch along the outer border and pull tightly to cinch the fabric neatly against the inner frame.
Common Troubleshooting Tips
- Loose or Sagging Florets: If your Portuguese border wraps slide down the straight bars, ensure you wrap each bar twice firmly before moving upward. Keeping your working thread perpendicular while wrapping prevents slippage.
- Fabric Puckering: Avoid pulling leaf and stem stitches too tightly. The fabric should remain flat and taut without puckers radiating from stitch entry points.
- Snagging Floss Bundles: When using 12 strands of floss, pull the thread slowly and smoothly to keep strands parallel and prevent knotting on the back of your work.
Frequently Asked Questions
Can I use French knots instead of Portuguese border stitches?
Yes, French knots or colonial knots can also create lovely lavender blooms. However, the Portuguese border technique demonstrated here provides structured, uniform floret spikes that build quickly with dramatic raised texture.
What is the best fabric for beginner botanical embroidery?
A 100% medium-weight plain weave cotton or linen blend offers the ideal balance of stability, ease of needle penetration, and surface smoothness.
How do I wash my embroidered piece?
Hand wash gently in lukewarm water using mild textile detergent. Lay flat on a clean dry towel to air dry. To press, place the embroidery face-down on a soft fluffy towel and iron the reverse side on a low steam setting to preserve stitch loft.
Authoritative Pattern Resources & Standards
- For standard yarn weights and hook sizing, consult the Craft Yarn Council standard yarn weight system.
- Review foundational stitch definitions and historical terminology via the Wikipedia guide to crochet stitches.