A macramé leaf is a fringe motif shaped with diagonal double half hitch knots. It can hang as a wall accent, decorate a wreath, or become part of a larger fiber-art piece. Its shape comes from orderly rows and a final trim—not from cutting a leaf silhouette first—so take time to keep cord tension consistent and comb the fringe before shaping.
This beginner sample uses cotton cord, a holding cord, and folded working cords. Cord thickness, twist, combing, and personal tension change the finished size, so the cut lengths below are a starting sample. Make one small test leaf and adjust your next set of cords before cutting a large batch.
Materials and sample measurements
- One 30 cm (12 in) holding cord and 8 working cords about 40 cm (16 in) each for a small practice leaf; add extra length if your cord is thick, your knots are loose, or you want a longer fringe.
- About 3 mm single-twist cotton cord is easy to comb, but braided cord creates a different, less feathery finish.
- Dowel or macramé board, T-pins or a clamp, sharp scissors, comb, tape measure, and scrap cord for testing.
These measurements are a practice baseline, not a guaranteed finished dimension. Knot rows consume cord; combed fiber also spreads wider than uncombed cord.
Step 1: Secure the foundation
Anchor the holding cord securely to a dowel or board so it cannot slip. Fold each working cord in half and attach it to the holding cord with a lark’s head knot, spacing the knots evenly along the section that will become the leaf. Keep the two tails of each folded cord hanging freely. For a practice leaf, use an even number of working cords so the left and right sides can be balanced.
Pin the foundation to a stable surface. The holding cord should be firm but not stretched thin. If the cords slide while knotting, stop and improve the anchor before continuing.
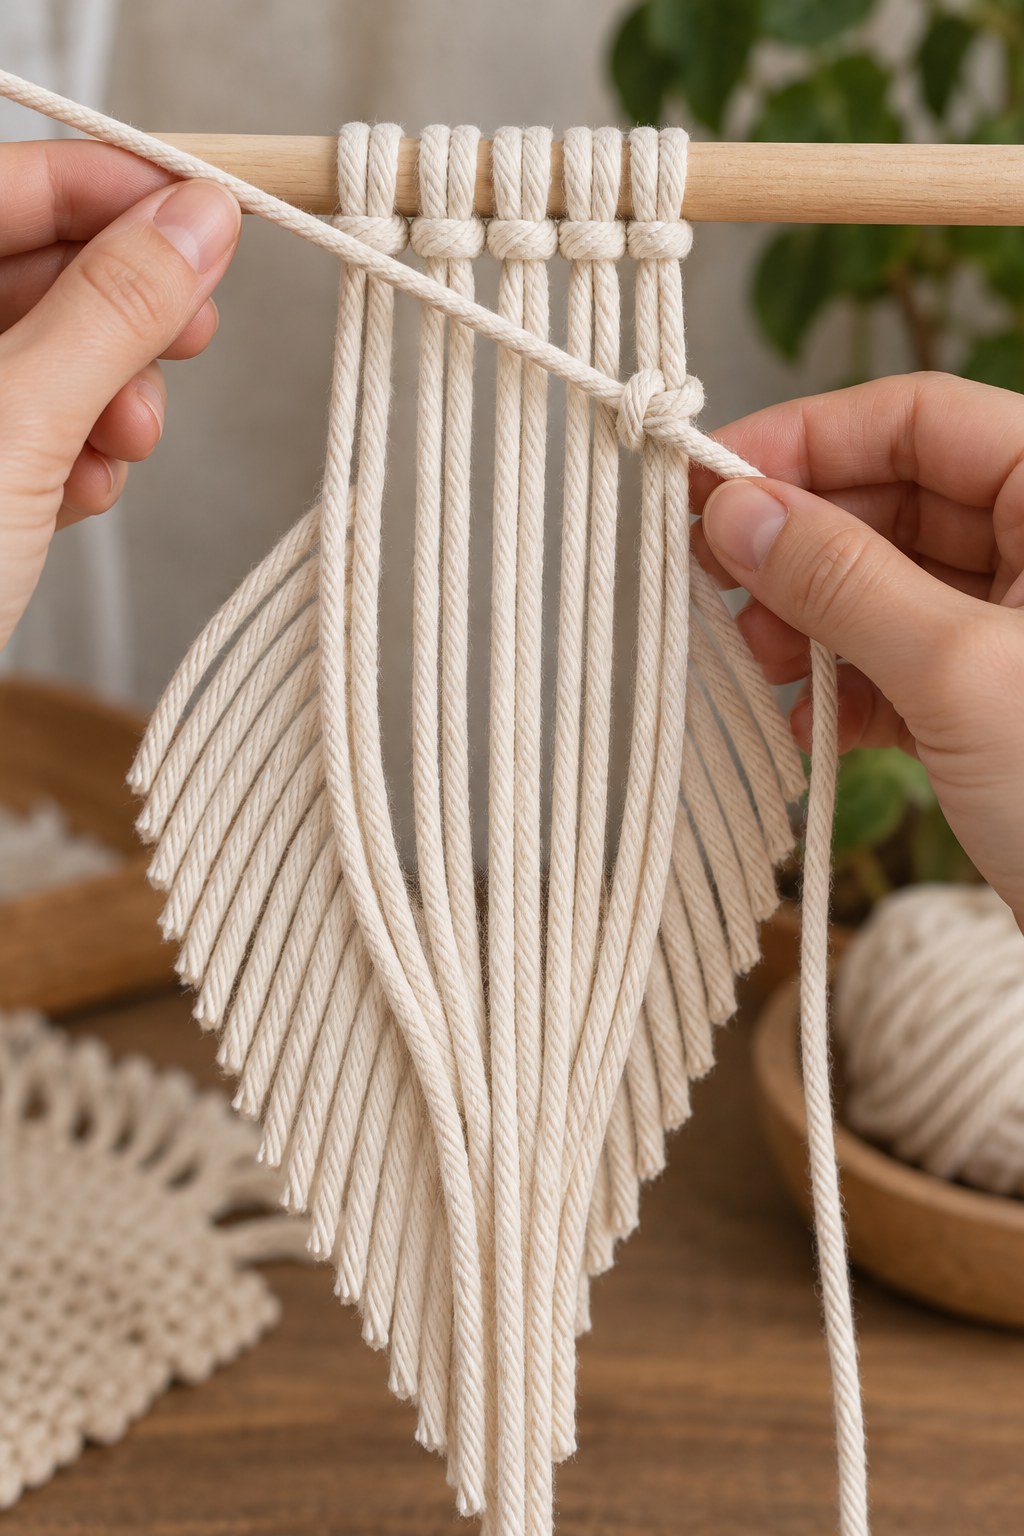

Step 2: Make the first diagonal row
Choose an outside cord to act as the guide cord. Lay it diagonally toward the center at the angle you want the first edge of the leaf to follow. Take the neighboring working cord and tie a double half hitch around the guide: pass the working cord over and around the guide, tighten the first half, then repeat to complete the pair. Pull each knot snug against the previous one, not so tight that the guide changes angle.
Continue with the next working cord along the guide, making each pair of wraps in the same direction. The repeated knots form a raised diagonal ridge. Count the cords as you work so you do not skip one.
Step 3: Shape the other half
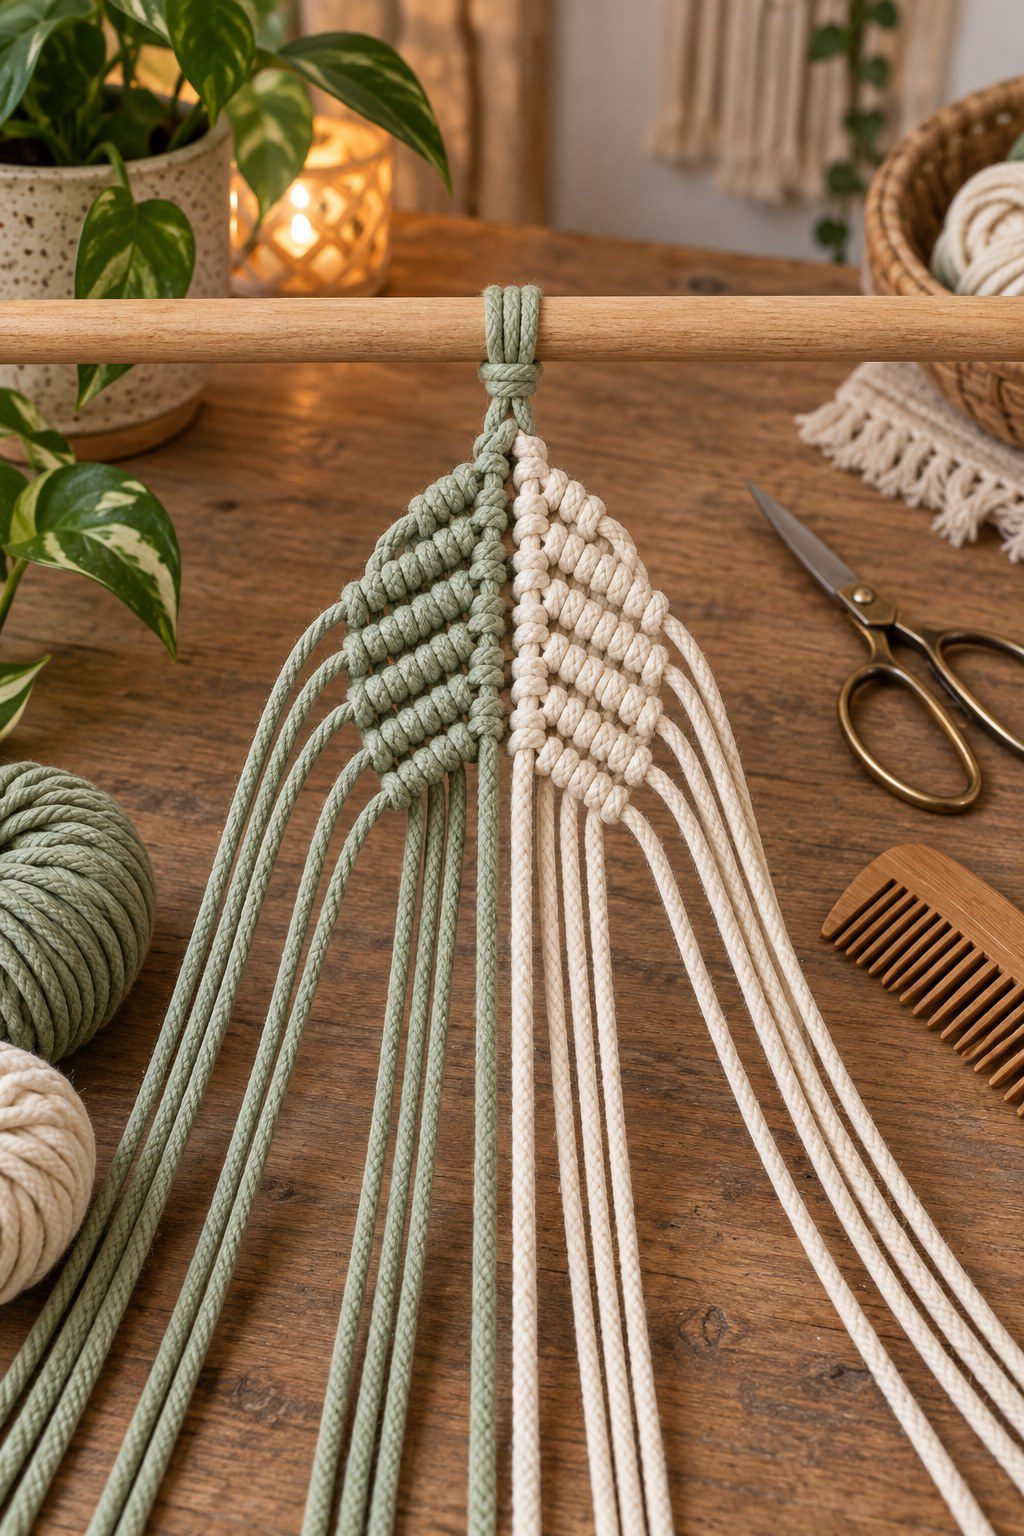
Arrange the remaining cords as a mirror image. Set a guide cord diagonally toward the center from the opposite side, then work double half hitches along it, keeping the angle and knot spacing similar to the first side. Lay the two diagonal rows close enough to meet neatly near the centerline. If the rows cross or leave a large gap, undo a few knots and reset the guide rather than pulling harder.
Repeat alternating left and right rows down the length of the leaf. To create a tapered tip, shorten the row gradually by using fewer working cords as you approach the end. Keep a small tail below the last knots for fringe. The exact number of rows depends on sample length and cord thickness.
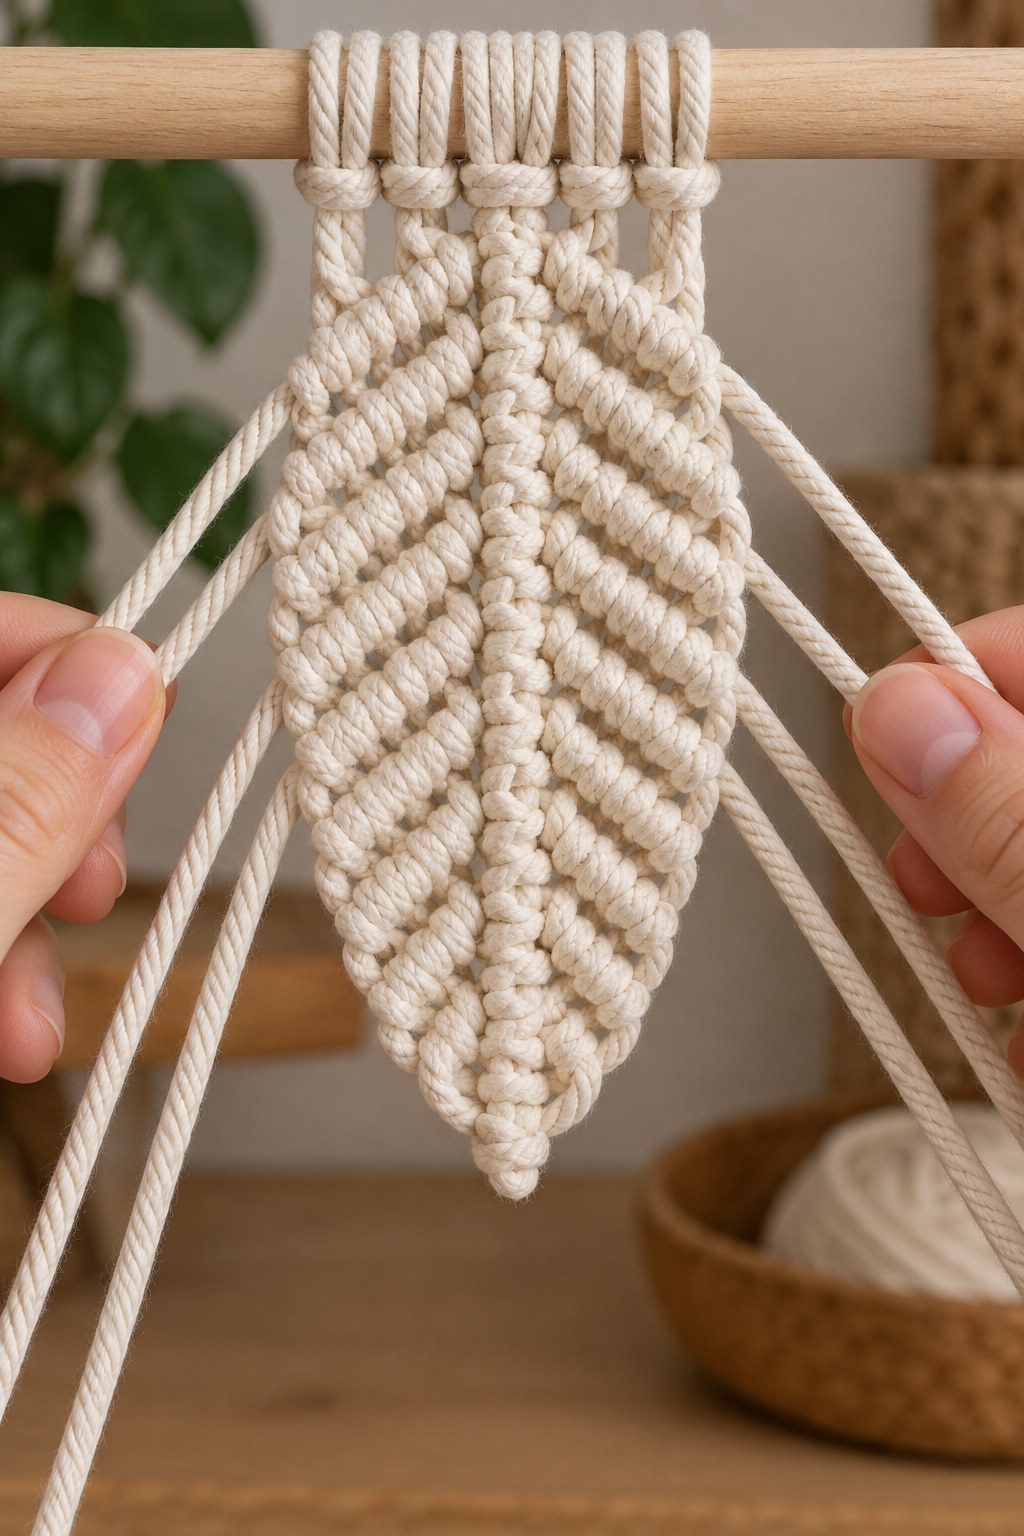
Step 4: Comb, trim, and secure
Remove the leaf from its anchor only when the final knots are secure. Comb the loose tails gently from the ends toward the knot rows, teasing apart the cotton plies a little at a time. Hold the knot ridge so combing does not pull it loose. Trim the fringe with sharp scissors: first cut a conservative outline, then refine the leaf into a pointed oval or rounded shape. Check both sides and trim small amounts evenly.
Do not use flame to finish cotton cord. If the motif will be handled often, secure the final knots with a small amount of suitable textile adhesive only if the cord maker recommends it, or leave the knots firm and the ends long enough for the design. Test any adhesive on scrap because it can discolor or stiffen cord.

Fix uneven leaves
- One side is wider: compare the number of cords and knot rows on each half. Undo the mismatched section and repeat it rather than trimming away all the difference.
- The center gap is too large: reset the guide angles so both rows meet closer to the centerline.
- Fringe looks tangled: separate the cord plies before combing, then work from the tips upward in short strokes.
- Leaf unravels when combed: make the final knots more secure and hold the knot ridge while brushing. Test the cord on a small sample first.
Use the leaf in a larger project
Attach the leaf to a branch, wreath, or wall hanging after testing the hanging balance. Pair it with foundational knots in our macramé knots guide, or add it as a botanical detail to the macramé wall hanging tutorial. Our macramé practice guide has more ideas for consistent tension and clean finishing.
For another visual demonstration, see Fire Mountain Gems’ macramé leaf instructions and the DMC macramé stitch diagrams for double half hitch formation.
Frequently asked questions
What cord is best for a brushed leaf?
Soft single-twist cotton is easy to comb and shape. Braided or multi-ply cord may not separate into the same fringe, so test before starting.
Can I make the leaf larger?
Yes. Use more working cords and longer lengths, but remember that deeper knots use more cord. Make a sample first and add a margin to each cut length.
How do I keep both sides symmetrical?
Use matching cord counts, compare the guide angles after each row, and delay final trimming until both halves are knotted and combed.